


Slowing Channing Dimension
Type 3:
Slowing Channing Dimension
Type 3 is used to maintain history to a specified number for the records in the
different columns. It will insert the new records and update new data into
history col 1 by moving data from history col 1 to history 2, history col 2 to
history col 3, etc based on no of history you want to maintain.
Example:
In SCD Type 3 we need to defined how many history data you want to maintain. In this history data will be maintained in the same row but in the different columns. When you run job first time the columns like salary, location will be stored in columns salary1 & location1, when you run the same job second time salary1 & location1 will be moved/stored to salary2 & location2 so that new salary & location will be stored in salary1 & location1, etc.Sample Mapping:
1. Drag and Drop required source and target instance to the mapping work space.

Note here we required 2 target instance one for insert data and another for update data

2. Add the lookup to the mapping to check whether the income row/data is exist in target or not.
Select Lookup Icon and click on mapping work space, we will be get screen. Select Target table inside the window. And select your required target table on which you want to do lookup or check the income row/data exist or not.

3. Lookup transformation will be created which is same as target instance.
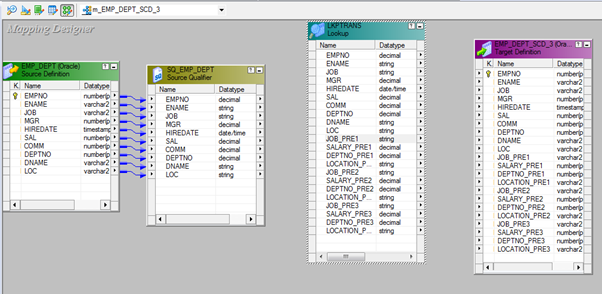
4. Drag & Drop Required or All the ports/columns to the lookup transformation from Source qualifier.

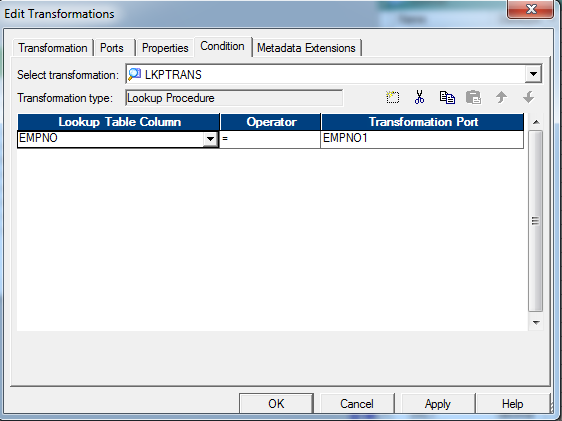
5. Double click on Lookup transformation then go to --> condition tab
select the condition columns. Left side columns are lookup columns and Right side columns are input columns.
6. Add a router and create two group (Insert Group and Update Group). Then drag and Drop all columns coming from source and Unique columns from lookup, 1st & 2nd history column.
(The columns highlighted in yellow in below screen are history 3) which is not required as that will be replaced with history 2 columns.

7. From InsertFlow of the Router group mapping columns to as shown below. As they are new records they will go as insert.
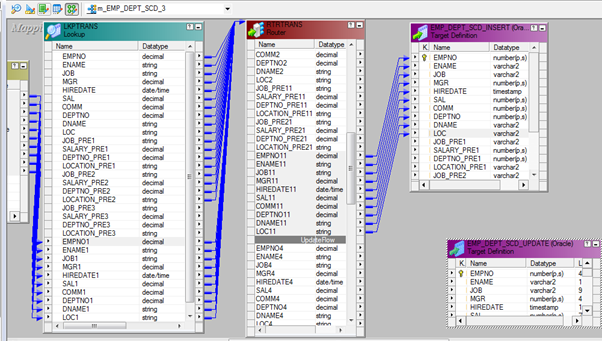
8. Drag and drop columns from UpdateFlow of the router group mapping incoming ports, history 1, history 2 and history 3 columns to the Update Strategy.
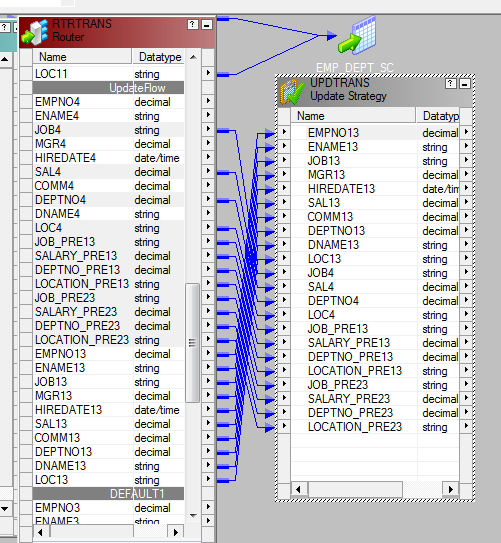
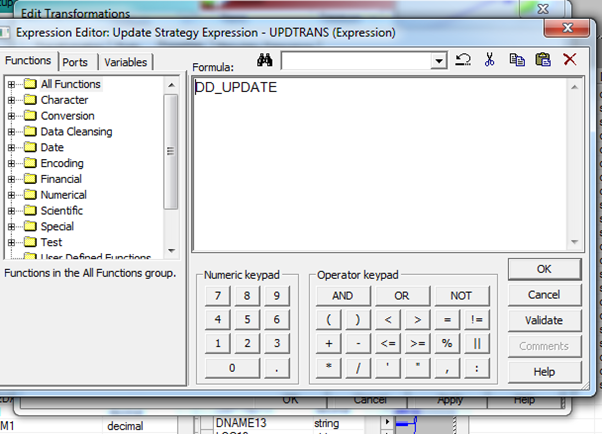
9. Select Update Strategy, double click and go to property tab --> Under formula mention "DD_UPDATE" as they are going to update the history.
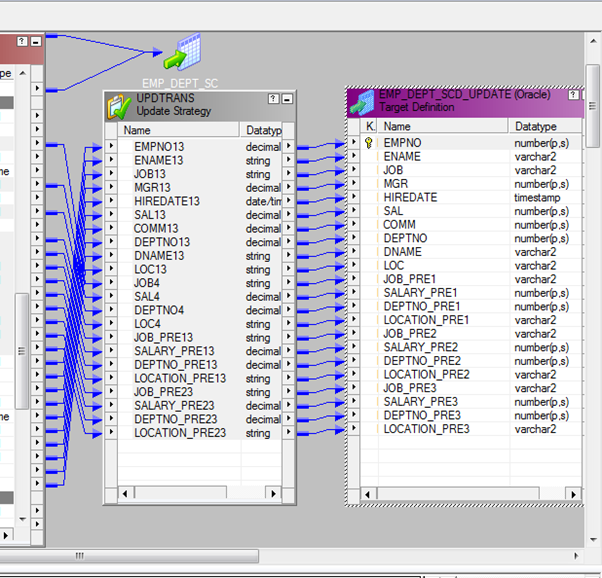
10. Drag and drop columns from UPDTRANS transformation mapping incoming ports to 1st match columns, columns suffix with _1 should map with target columns suffix with _2 and the columns suffix with _2 should map with target columns suffix with _3. (By means here in SCD type 3, values will be shifted from history 1 to history 2 column and history 2 to history 3 columns. As in this case we are maintaining once 3 history only) as shown below
11. Save and validation mapping.
Now Create Workflow and Session for the above created mapping.
12. Connect to workflow manager. From Menu, Click Tools --> select 'Workflows' --> Create
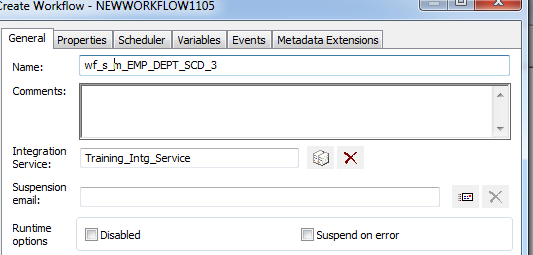
Here Name the workflow then click on Apply and Ok.
13. To create session click on session icon selected in Red Box in below screenshot. Then it will pop up a screen with list of mapping available in that folder. Please select the mapping for which you want to create this session. Then click on OK.

14. Then connect your session with Start Icon in the workspace
15. Select the session and double click on it. Then go to mapping tab as show below

16. Go the Source Folder and select the SQ instance to defined connection. Click on down arrow button highlighted below to select the required connect for the instance. (If no connection available then you have to create connection first the assign here again.)

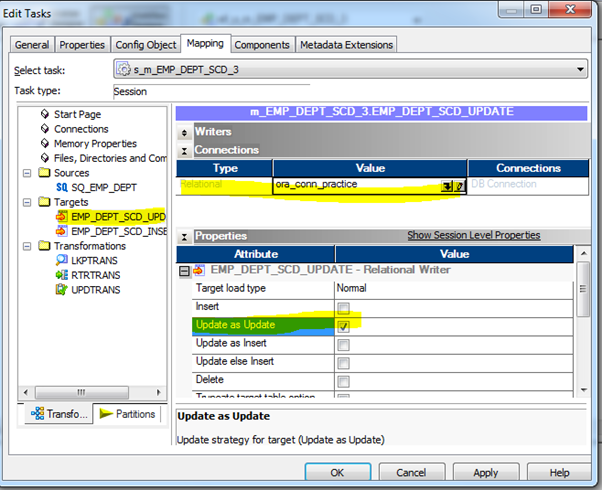
17. Go the Target Folder and select the Target instance for Update flow to defined connection. Click on down arrow button highlighted below to select the required connect for the instance. (If no connection available then you have to create connection first the assign here again.)
And under properties select "update as update" only as here we are update the existing records.
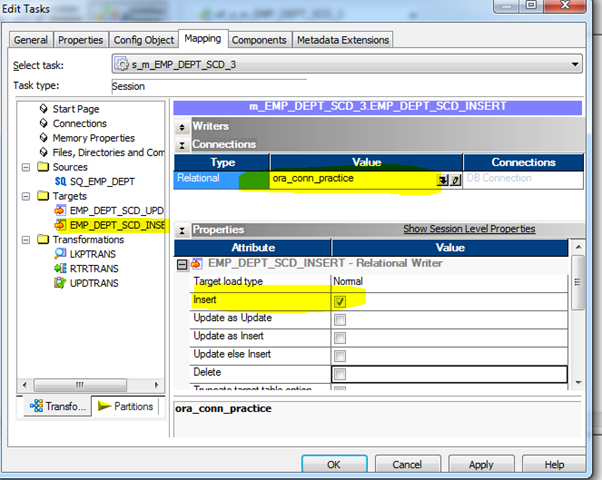
18. Go the Target Folder and select the Target instance for Insert flow to defined connection. Click on down arrow button highlighted below to select the required connect for the instance. (If no connection available then you have to create connection first the assign here again.)
And under properties select "Insert" only as here we are insert the new records.
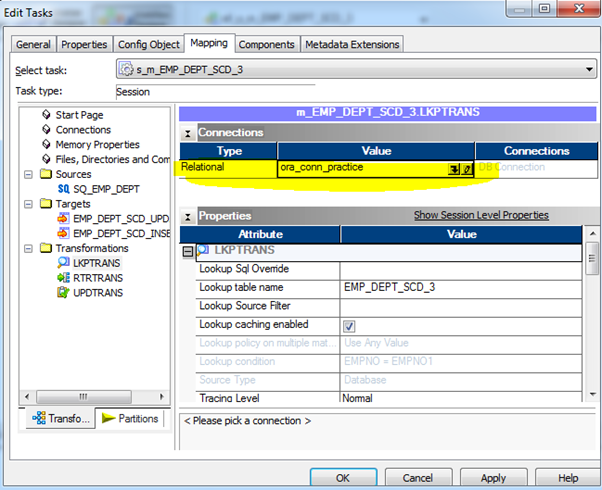
19. Similarly we do have to mapping connect to Lookup also as we are doing lookup on target to check the records existence.
Go the Transformation Folder and select the Lookup instance to defined connection. Click on down arrow button highlighted below to select the required connect for the instance. (If no connection available then you have to create connection first the assign here again.)
20. Then Click o Apply and Ok.
21. Save workflow and validation. Now you can run your job.
Below is the screenshot from the first time load. Here it is having 14 records.

To check history or modified records are maintained correct I have check below highlighted values. So that after my second run those values will be more to history 2 columns.

Below highlighted in green colour box having newly inserted records, records colour in red box are history/modified data records. Under that the values marked blue are previously in history 1st values from the above screen now they are moved to history 2.

Please try and let me know if any issue.
0 comments:
Post a Comment